Easiest and Most Delicious French Baguette Ever

56315783724__5E410E54-398F-4343-8430-93C408D8F765.fullsizerender

I am not kidding here…  This is the most surprisingly easy recipe for French baguette that I have ever tried in my entire life! Now you might say that “easy” doesn’t mean “good” or “authentic” at all, but…  it has been tested by the French Connection (including myself as well as the fam) here in San Diego and it was unanimously approved! Now the beauty of this super simple recipe is that there is no kneading or poolish involved! You can basically get the dough ready in the evening (in about 10 minutes), let it rise overnight and cook your bread in the morning for a delicious and typical French breakfast.

Ingredients:

  • 2 1/2 cups of unbleached bread flour (375 grams)
  • 1 1/2 tsp of salt (8 grams)
  • 3 tsp of bread machine rapid rise yeast (12 grams)
  • 1.2 cups of lukewarm water (300 ml)

How to:

In a mixing bowl, mix the yeast with a little bit of the lukewarm water to dilute it and then add the rest of the water

Add the flour and the salt and mix roughly with a wooden spoon (yep you read that right)

Cover the bowl with a cotton fabric towel and leave for about 1 hour and 1/2 until the dough has doubled in volume

Preheat the oven to 465°F (240°C) and fill the drip pan with water (the moisture released will help the crust be more crunchy during the baking process)

Remove the dough from the bowl and place on a lightly floured baking sheet or stone (you can line it with parchment paper), or directly into  The dough will be very sticky but it is totally ok and normal.  Stretch it in one long baguette, or you can separate in two or more pieces to make more baguettes (smaller ones though). Don’t work the dough too much so it doesn’t go down.

IMG_5502

Make beveled cuts on top of each baguette with scissors or a blade (2 or 3 cuts per baguette loaf)

Place the baguettes in the oven and cook for approximately 30 minutes (each oven is different so cooking time may vary)

Take the baguettes out of the oven and let cool on a rack and wait about 30 minutes before cutting.

Store in a cotton fabric bag or a towel (no plastic please!).  It will keep for about 2 days but I guarantee you that it will be gone way before that! You can also freeze them but do it the day you baked them and once they are cooled.

Bon appétit! 🇫🇷


French Alpine Hot Cocoa Recipe


Processed with VSCO with j1 preset

This one drink brings me back to the place where I grew up, in the French Alps.  It is a delicious warm drink (for both vegans and non-vegans) that combines an old traditional European hot chocolate recipe and a delicious and surprising ingredient.  The beverage is enhanced with Chartreuse liqueur, which is produced by French monks from a 400-year-old recipe. Both Green Chartreuse and Yellow Chartreuse (we will use the green one in this recipe) use a secret blend of 130 herbs and plants and the entire operation is still overseen by just two monks (and manufactured near my hometown in the Alps).  The liqueur has a unique taste that you probably haven’t had before, but it is worth a try as it is considered one of the best liqueurs in the world.  Check with your local liquor store to see if they sell Chartreuse.  If not, I have linked an online shop below that sells it. Be ready for a cup of hot cocoa with a very pleasant twist!

For one cup:

Ingredients

8 oz of plant milk or regular milk for non-vegans
2 tsp of hot cocoa powder (I get mine from Trader Joe’s and it is inspired by a traditional European recipe).

1/2 or 1 tbsp of green Chartreuse (Shop here)
1 tsp of brown sugar

In a cooking pot, combine the Chartreuse, the hot cocoa powder, the sugar and the plant milk.  Warm up at low heat and remove right before boiling (do not boil really, I am serious here!)

Remove from heat and serve in a mug.  Sit back, relax and enjoy…

Non-alcoholic and kids friendly version: Don’t add the Chartreuse and add a cinnamon stick during the warm-up process!  Delicious!


Beeswax Reusable Food Wrap DIY

Processed with VSCO with a9 presetOne of the first changes our family made when we started our journey to reduce our use of plastic, was to eliminate plastic food wrap.

We used to cover most food leftovers or simply wrap anything that would go in the fridge with the stretchy film.  We would buy them by the roll, and we even had one that was 3000 ft long once because a friend of ours bought it for us thinking that was the size we wanted… it took us four years to finish it… not our proudest moment looking back, and thinking where this plastic is standing right now and how long it will be there for… Eeeek!

Fortunately, reality and awareness of the plastic problem that we, humans, have created, sunk in and our family decided to make some major changes to get rid of the plastic film use completely.

Going back to basics by storing food in glass containers was the first option we chose.  Additionally and after doing a little research we found out about beeswax reusable food wrap, which is totally amazing and sustainable, as well as safe, and can be used exactly like plastic food wrap, but without the yucky plastic. The only downside to this amazing product: the price tag…

Now the DIYer in me could not resist the temptation of making her own beeswax wrap, soooo… I tried, and I can say I succeeded! The process was easy as can be, and the wrap worked like a charm!  Now, just so you know, if I can do it, so can you! The good news is that you only need two items to make a large quantity of beeswax reusable food wrap: cute fabric (cotton or hemp) and beeswax (we have our own beehive so beeswax is easily available to us, but you can also purchase in craft stores or online). And that’s it!  For a fraction of the price of the store-bought ones, you can get your own, personalized, homemade, reusable beeswax food wrap!

Processed with VSCO with a8 preset

So if you are willing to make this change (I really hope you do… ) and if you are a little crafty (just a little…), check out the tutorial below.

Now if you prefer buying the wraps already made, I highly recommend the ones I first bought, but I have to warn you that the price is a little high… The brand is Etee and our family purchased a pack of 3 wraps two months ago ($18) and we are extremely satisfied with the products!  Also, I went to Trader Joe’s this morning and was super (and pleasantly) surprised to see that they started selling some beeswax food wraps at a very cheap price ($8.99 for a set of three). I bought 2 sets but since I have not tried them yet, I can not say if I recommend them or not…

Processed with VSCO with a8 preset

Beeswax Food Wrap DIY

What you need:

  • Cotton or hemp fabric of your choice
  • Beeswax in granules (You can buy it at your preferred craft store or here)
  • A paint brush
  • Pinking shears to cut the fabric and prevent fraying

Processed with VSCO with a8 preset

How to:

  1. Preheat oven to 185°F (85°C)
  2. Cut your fabric in pieces of different sizes (make sure to cut some that will cover your biggest bowl)
  3. Line a cookie sheet with parchment paper and place a piece of pre-cut fabric on it
  4. Sprinkle the beeswax evenly on the fabric (very little is actually needed)
  5. Place the cookie sheet in the preheated oven and watch the beeswax melt (it only takes a few minutes…)
  6. Once the beeswax is completely melted, use the paintbrush to cover the beeswax evenly on the fabric, making sure the entire piece is coated
  7. Let it cool down

Your new beeswax food wrap is ready to use!

Processed with VSCO with a9 preset

Cutting the fabric with pinking shears will prevent fraying

Processed with VSCO with a9 preset

Make sure the beeswax pellets are evenly spread out on the fabric

Processed with VSCO with a9 preset

Once the beeswax has melted, spread it evenly with the help of the paintbrush, to make sure the entire piece of fabric is coated

Processed with VSCO with a9 preset

How to care for your beeswax food wrap:

Wash with mild soap and cold water (do NOT use hot water as it will melt the beeswax coating)

Do not wrap any raw meat or fish in your beeswax food wrap (since you can’t wash it with hot water, it is probably safer not to use it for this purpose…)

Air dry

Depending on how often you use it, it will usually last a long time

Processed with VSCO with a9 preset

Easy and Delicious Ginger Beer Recipe

Suddenly my Moscow Mules (one of my favorite cocktails) got much more homemade than I ever thought I would drink them. Nope I am not distilling vodka in my garage yet as I do not have a distilled spirits permit, and I don’t intend to get one or even make vodka, but I just added Ginger Beer to my list of made from scratch items, in my journey to going back to a more back to basics, homemade lifestyle.  So what is Ginger Beer you may ask?…  For those of you who are familiar with, as mentioned above, Moscow Mules and/or Dark and Stormy cocktails, Ginger Beer is one of the ingredients that make those drinks so fabulous.

Processed with VSCO with a9 presetNot to be mistaken with Ginger Ale, Ginger Beer is a naturally sweetened and carbonated beverage (non-alcoholic even though it is called beer, though the original drink that started in England in the 1700s, contained alcohol).  What we call today Ginger Beer is produced by the natural fermentation of prepared ginger, yeast, and sugar, and has gained a lot of popularity in the past few years as a refreshing and spicy drink, that can be enjoyed alone or mixed in several cocktails.

Making Ginger Beer at home is actually fairly simple and by doing so, it will allow you to save a bundle of money compared to the store-bought one.  In addition, you will know exactly what was put in your drink, as well as experience the satisfaction of making it yourself!

By following these instructions, you should obtain a delicious beverage in about 3 days, when the fermentation has peaked.  Please note that the more you wait, the more bitter drink you will get, which is totally your choice, and according to your own taste.

Here is the recipe that I made the very first time and  I was so satisfied with the results that I decided to keep it as is.

Ingredients:

  • 1/4 cup of grated fresh ginger (I put mine in a food chopper)
  • 1/4 cup of fresh pressed lemon juice
  • 9 cups of water
  • 1 cup of granulated sugar
  • 1 tsp of active dry yeast (I use the Rapid Rise one and it works great)
  • 1 2-liter plastic bottle (an empty and washed soda or water bottle will be just fine)
  • 2 1-liter glass bottle with stopper (I got mine from Ikea)
  • 1 1/2-liter glass bottle with stopper (Ikea sells them too)
  • a fine strainer

Processed with VSCO with a9 preset

Place the grated or chopped ginger, the lemon juice and 4 cups of water in a pot and bring to a boil.  Once the mixture has reached a boiling point, turn the heat to medium and add the sugar until it has dissolved.

Processed with VSCO with a9 preset

Add the rest of the water (5 cups, cold), turn off the heat and wait until the mixture has reached a temperature of 75°F (24°C).

Once the temperature of 75°F has been reached, add the dry active yeast to the mixture, stir well and cover with a cloth or a towel.

After 3 hours, pour the mixture through the strainer and in a container with a spout (bottle, mixing bowl, etc…). The strainer will help separate the pieces of ginger from the mixture, to only retain the liquid.

Pour the mixture into the 2-liter plastic bottle, making sure to leave some room at the top.  This is a very important step as the fermentation will create some carbonation, therefore some gas will form, that will need some space to build up (again, I insist that you make sure this step is not omitted so you don’t end up with Ginger Beer all over the room).

Place the bottle in a warm and dark place for at least 2 days (the more you wait, the drier your Ginger Beer will be). Make sure you untwist the cap of the plastic bottle a few times a day (don’t untwist it completely) to release the gas.  Don’t worry if there is no gas the first day (I usually get some build-up I can hear and feel when untwisting the cap, on the second day). Be careful not to point the bottle at your face or someone else’s during this process, in case the liquid comes out.  Go slow too…

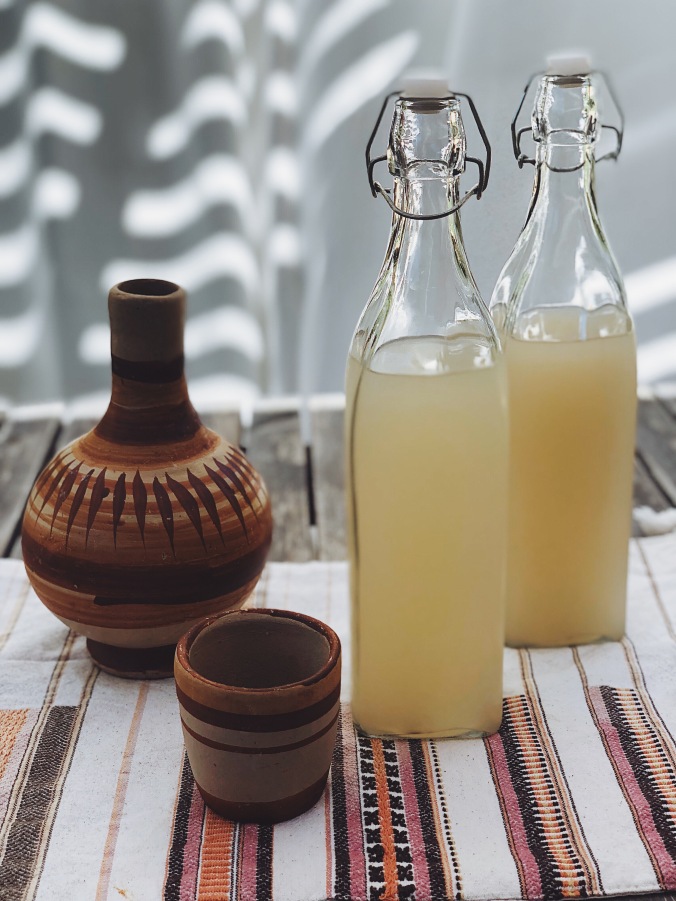
Once the Ginger Beer has fermented enough (2 or 3 days), pour the brew in the glass bottles and place in the fridge.  The fermentation process will be greatly slowed down and you will be able to enjoy your homemade Ginger Beer right away.  It can be kept in the fridge for about 10 days.  Et voila!

Processed with VSCO with a9 preset

This recipe is really simple and doesn’t require any particular skills to make.  Plan in advance if you would like to use it for mixed drinks on the weekend, or for a party.  Make sure your yeast is not too old as it might lead to your Ginger Beer not fermenting.

Cheers! Oh and because I love you guys and I love to share my recipes, here is the one for the Dark and Stormy drink.  You are welcome!

Dark and Stormy Cocktail Recipe

  • 2 ounces of your fave dark rum
  • 5 ounces of your very own homemade and delicious Ginger Beer
  • 1 lime wedge
  • ice

Pour the rum over the ice in a glass, pour your homemade Ginger Beer and squeeze the lime wedge in.  Salud!
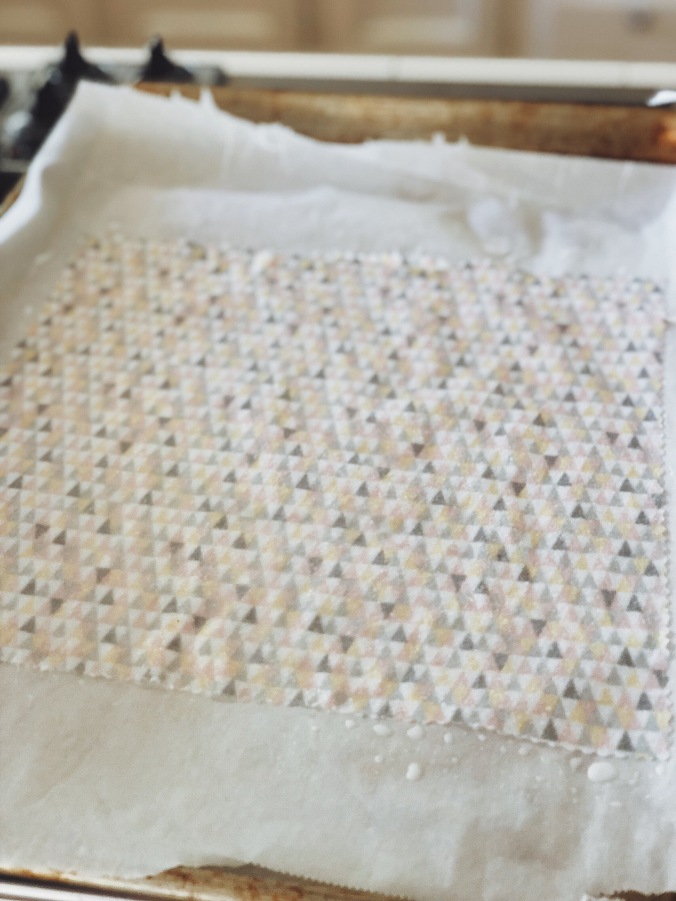
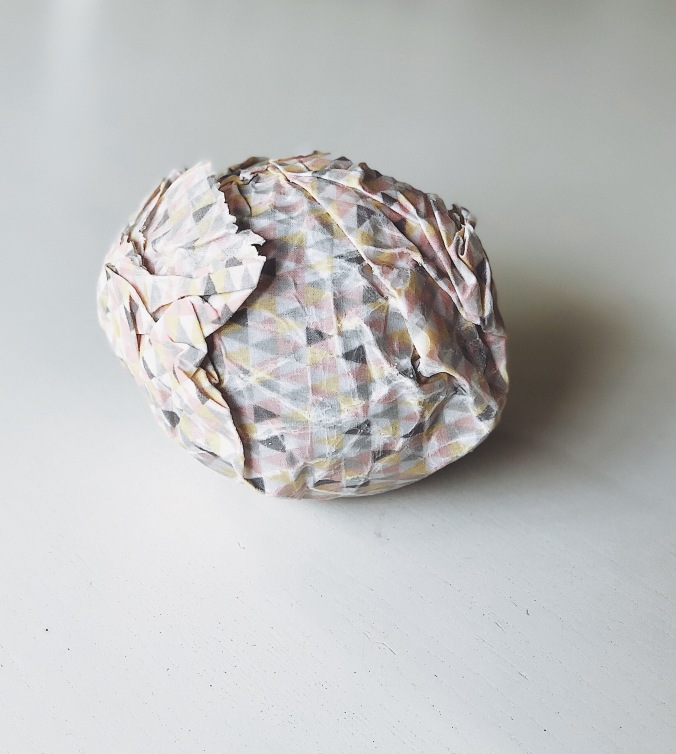


Homemade Trader Joe’s Organic Toasted Coconut Granola

Processed with VSCO with a9 preset

I am probably one of Trader Joe’s biggest fan.  I pretty much buy everything from cheese to tomato sauce and fruit (now that they finally decided to sell in bulk) to wine there. I don’t know if it is about the array of cool items from around the world (especially from my home country. Bonjour Trader Jacques!), their business model (no middleman is a good idea) or the atmosphere (nice staff, cool shirts and ringing bells always work) but I got hooked to the store since I first shopped there back in 1999, when Trader Joe’s was only popular in the Los Angeles area. I really wish that they cut back on the insane plastic packaging they are selling their products in, now that I realized the extent of the very complex plastic problem we have. And this is exactly why, in addition to a desire to consume less and make more things at home, I decided to replicate their  Organic Toasted Coconut Granola.  I have been buying this delicious granola for over a year now, and I pretty much use it every single day for breakfast. I am hooked on açaí bowls (see my standard recipe here) because they are simply delish and seem to give me all the nutrients I need in the morning, to last until lunch. Trader Joe’s Organic Toasted Coconut Granola is a key ingredient in my breakfast bowls but I had to buy it so often that I realized I was spending a lot of money for something I could easily make myself (and get rid of the plastic packaging waste). I looked at the ingredients on the bag and decided to go for it.  Everything in the recipe can pretty much be bought in bulk and large batches can be made as it keeps really well when stored properly. I almost forgot to mention that it is also Gluten Free and plant-based (vegan). It is also super easy and quick to make, and most of all absolutely delicious.  Here it goes…

Ingredients:

  • 1/2 cup of organic rolled oats
  • 1/2 cup of organic coconut flakes (or organic toasted coconut chips)
  • 1/2 cup of organic unsalted toasted almond
  • 1/2 cup of organic corn flakes
  • 2 Tbsp of organic coconut oil
  • 1/2 cup of organic quinoa
  • 1/3 of a cup of organic raw sugar
  • 1 tsp of Himalayan pink salt or sea salt
  • 1/2 cup organic rice flour
  • 1/3 of a cup of maple syrup
  • 1 Tbsp of pure vanilla extract

Processed with VSCO with a9 preset

How to make it:

IMG_3878

  • Preheat oven to 350°F (175°C)
  • Mix all the ingredients in a bowl
  • Spread the mixture evenly on a cookie sheet lined with some parchment paper
  • Bake for 30 minutes or until the granola barely starts to turn golden
  • Take out of the oven and let cool down
  • Store in a glass jar

Eat as is or mix with your choice of milk (almond, soy, coconut, dairy, etc…), dry fruit or fresh fruit. Top yogurt or kefir with it, include in smoothie bowls, açaí bowls (see my other amazing recipe here), etc… and remember to try to enjoy a little bit of it, because there is a high chance that your entire family will devour it before you know it …